Step-by-Step Guide for Call Scheduler App
This guide will help you navigate through the app’s features, making it easier to manage your calls, orders, reminders, and more. With these simple steps, you can maximize the functionality of Call Scheduler app, efficiently managing your contacts, tasks, orders, and appointments.
Import Contacts to the App: Add and Customize Priority Contacts One-by-One
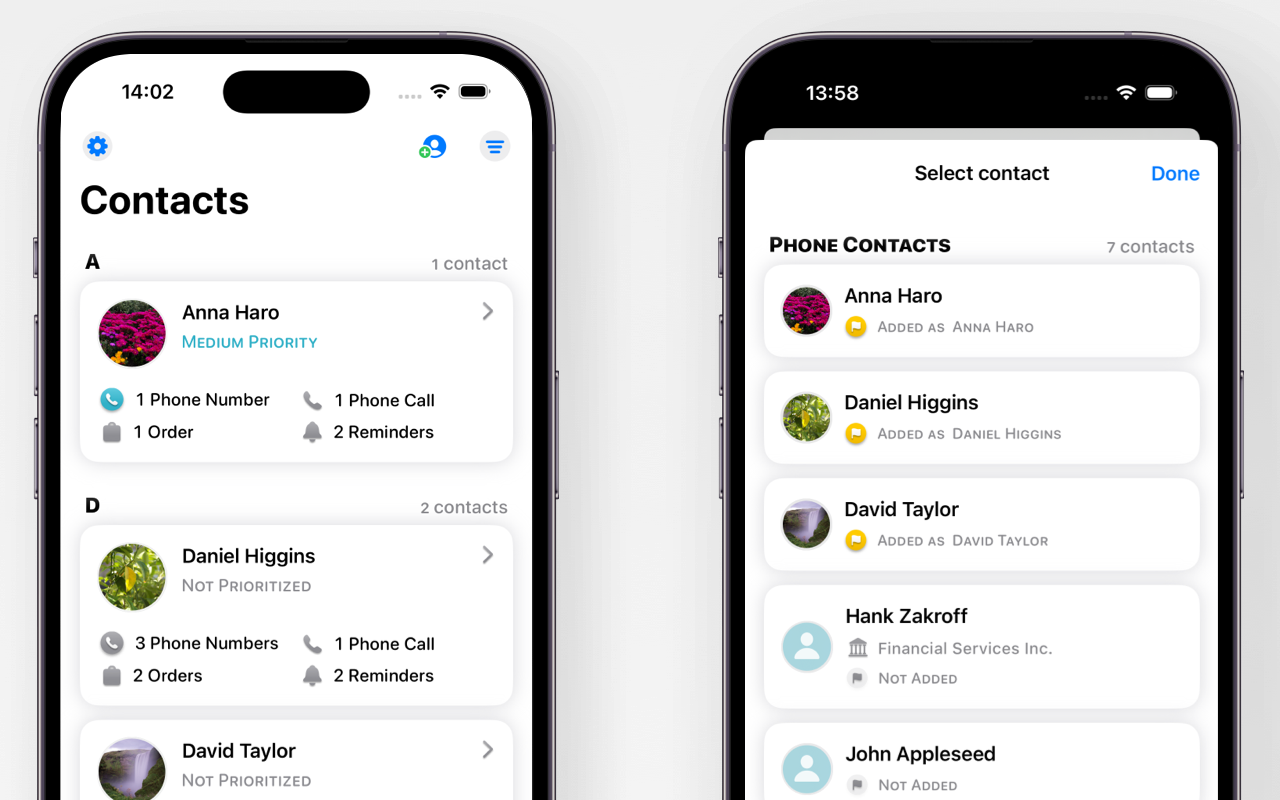
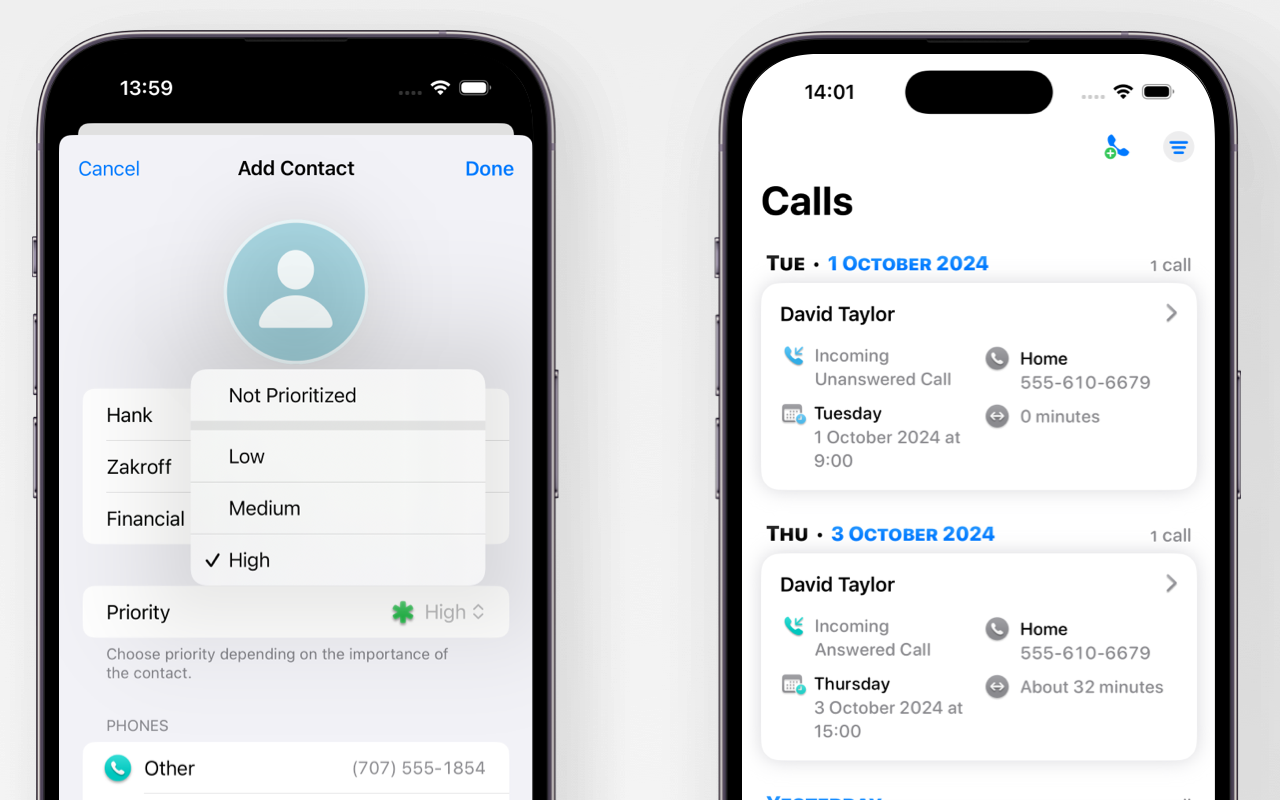
Add Contacts
Click on the contacts tab at the bottom of the screen, then - on the add contact button + at the top of the screen to select and import contact to the app. While importing, your can change a name, select phone numbers, define contact's priority. Tap "Priority" and select between low to high priority for the contact.
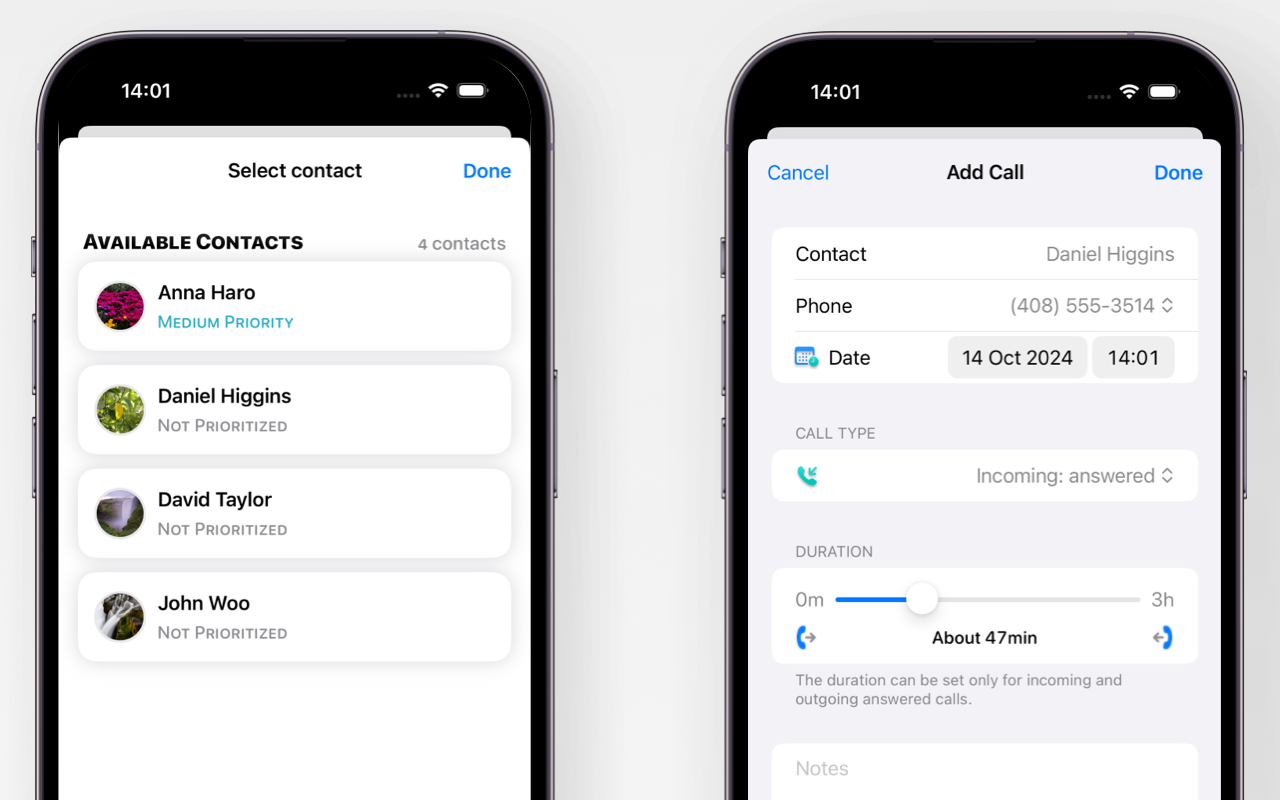
Record Call Statistics
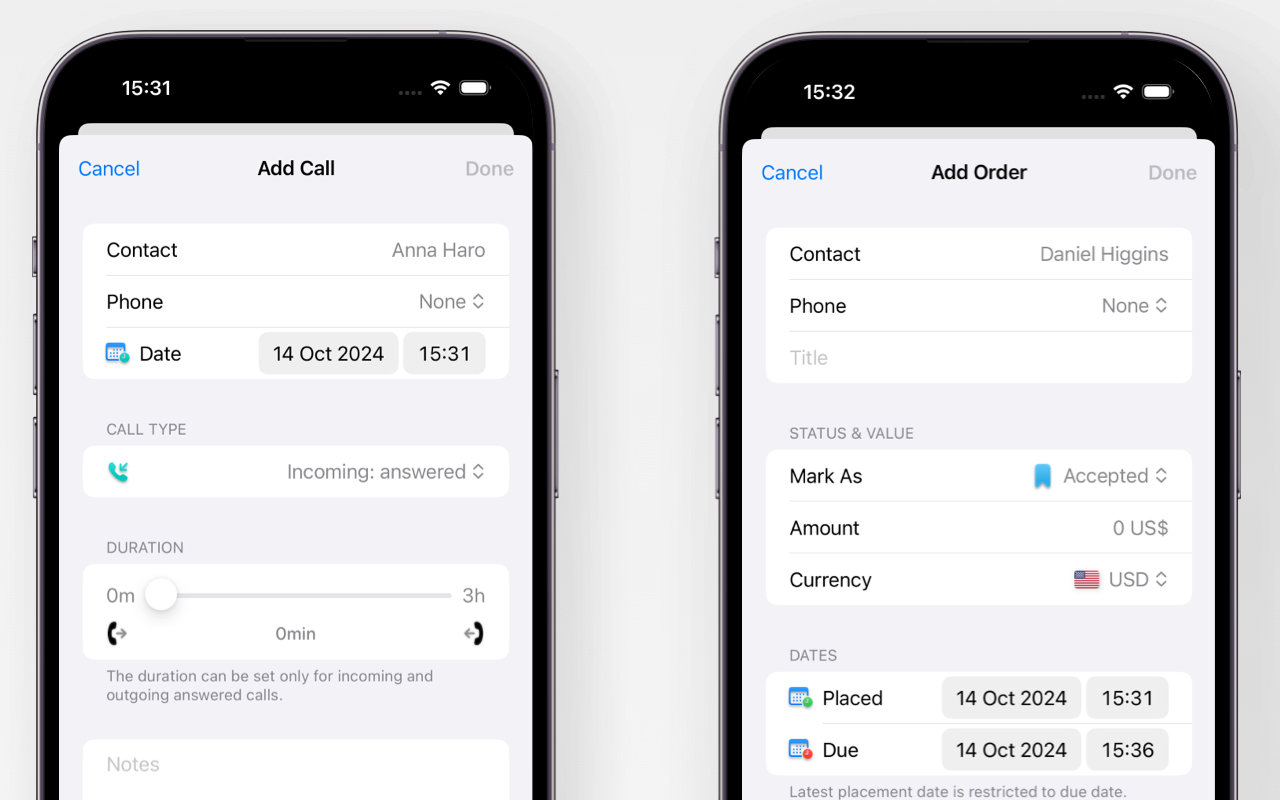
While finishing your call with the contacts added to Call-Scheduler, open the app and click the call tab at the bottom of the screen. Then click the add call button + at the top of the screen and select contact you talked. Add call details, then tap "Done" to save.
Observe Value-for-Time of Your Contacts: Get Calls and Orders Analytics
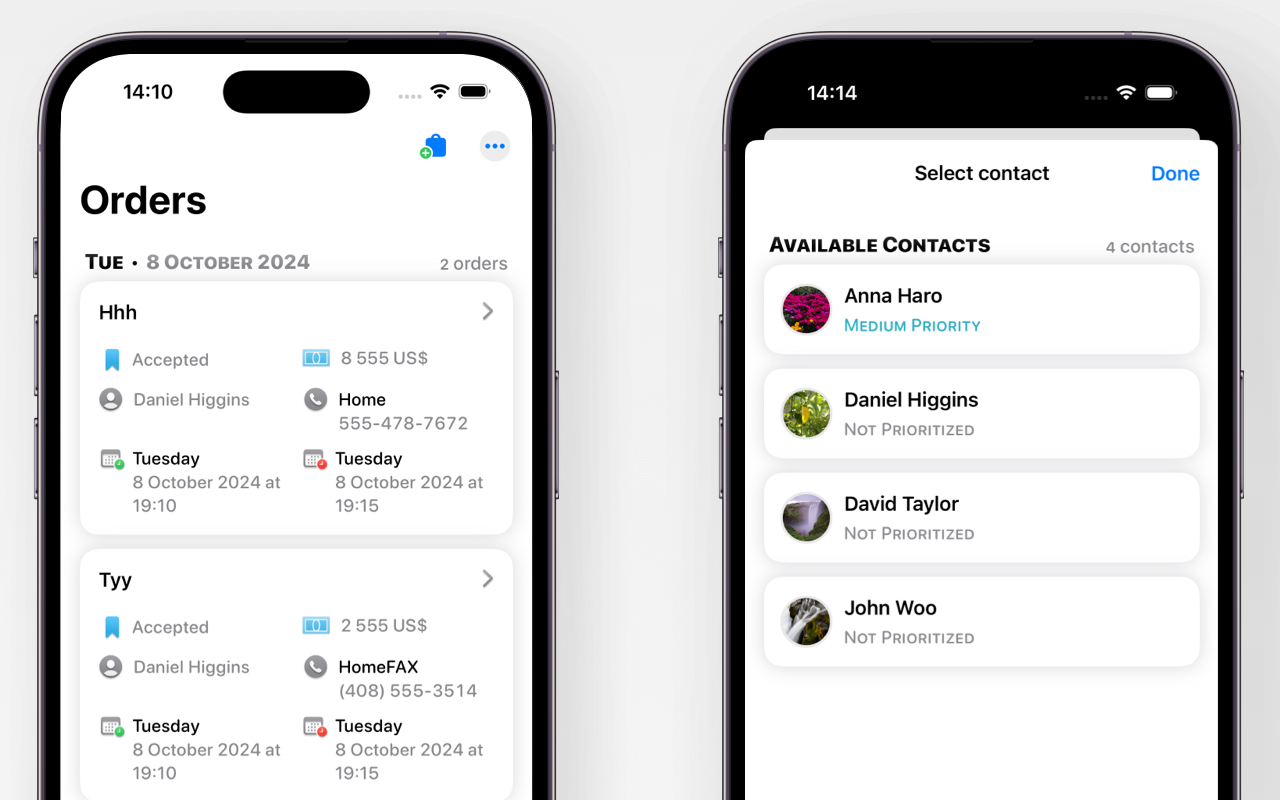
Add Order Statistics
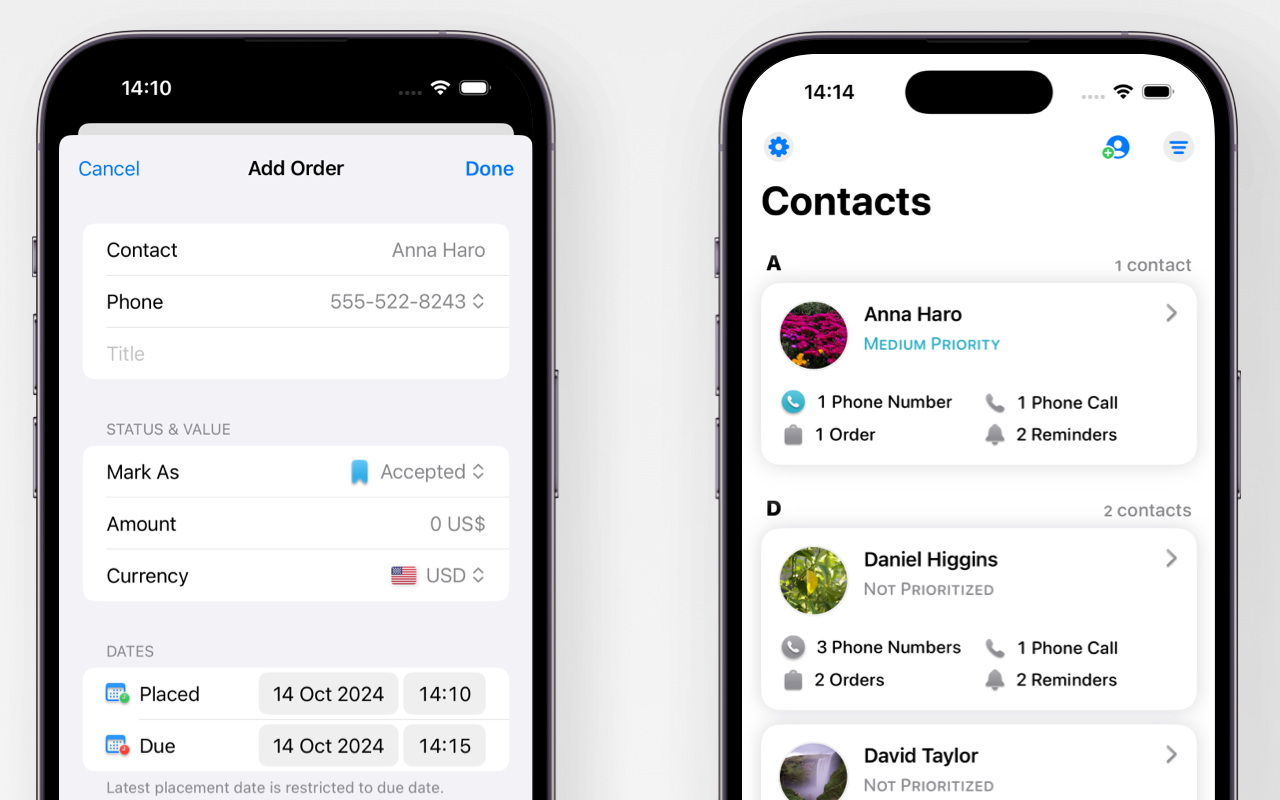
You can add orders' value to your contacts in Call-scheduler. Open the app and click the order's tab at the bottom of the screen, then - on the add order's button + at the top of the screen. Select contact you want to add the order's details. Add order's details, then tap "Done" to update.
Evaluate Performance
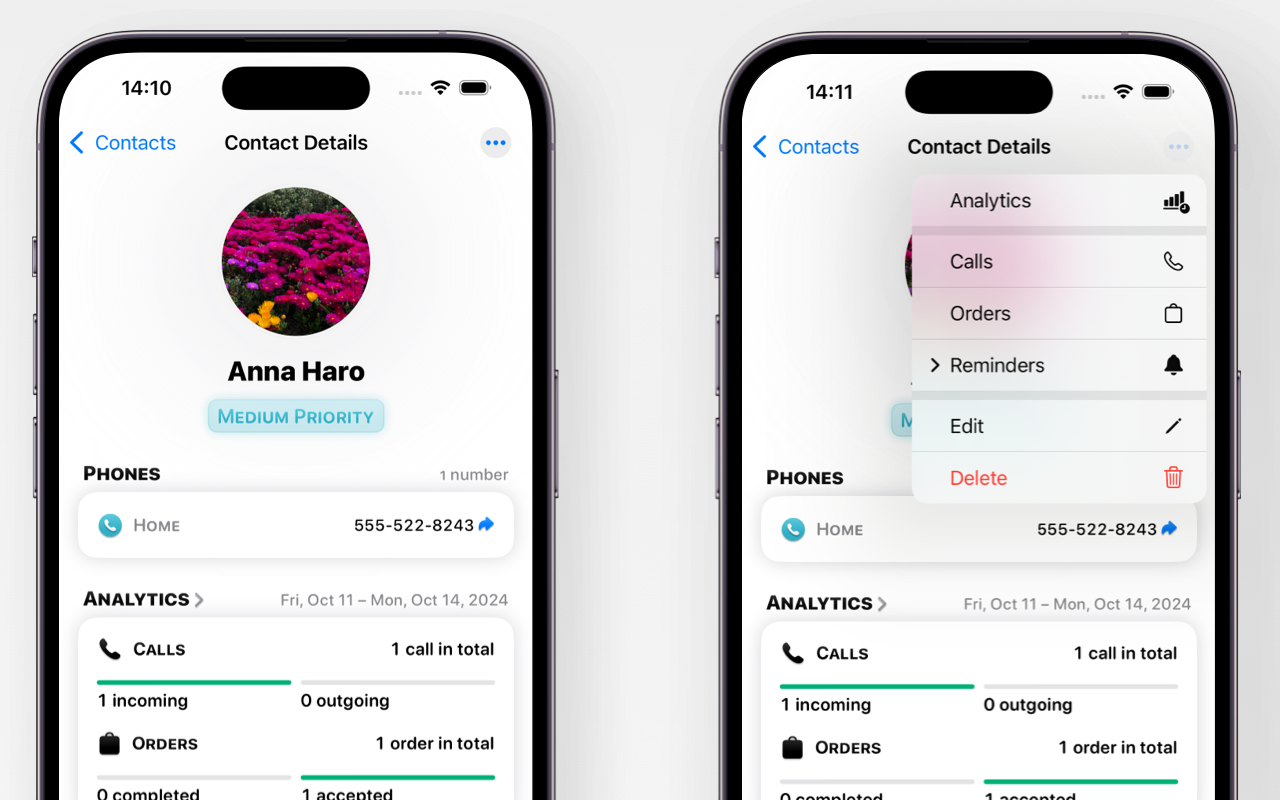
You can monitor your contacts value from Call-Scheduler. Click on the contacts tab at the bottom of the screen, then tap the contact's card. The app will display the contact's details with available analytics. Tap "Analytics" to get further detailed stats (by day, week, and month).
Get On-Time Notifications: Set Reminders for Appointments and Call-Backs
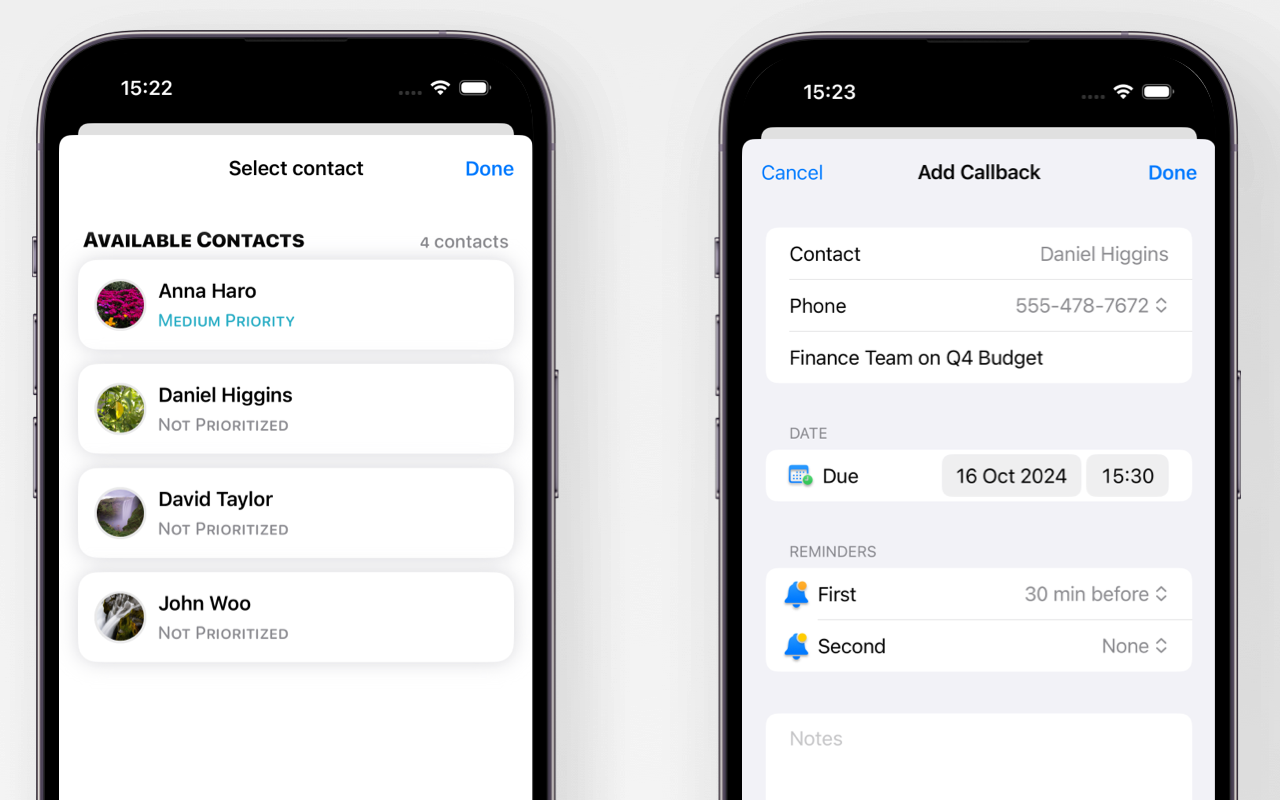
Appointments Reminders
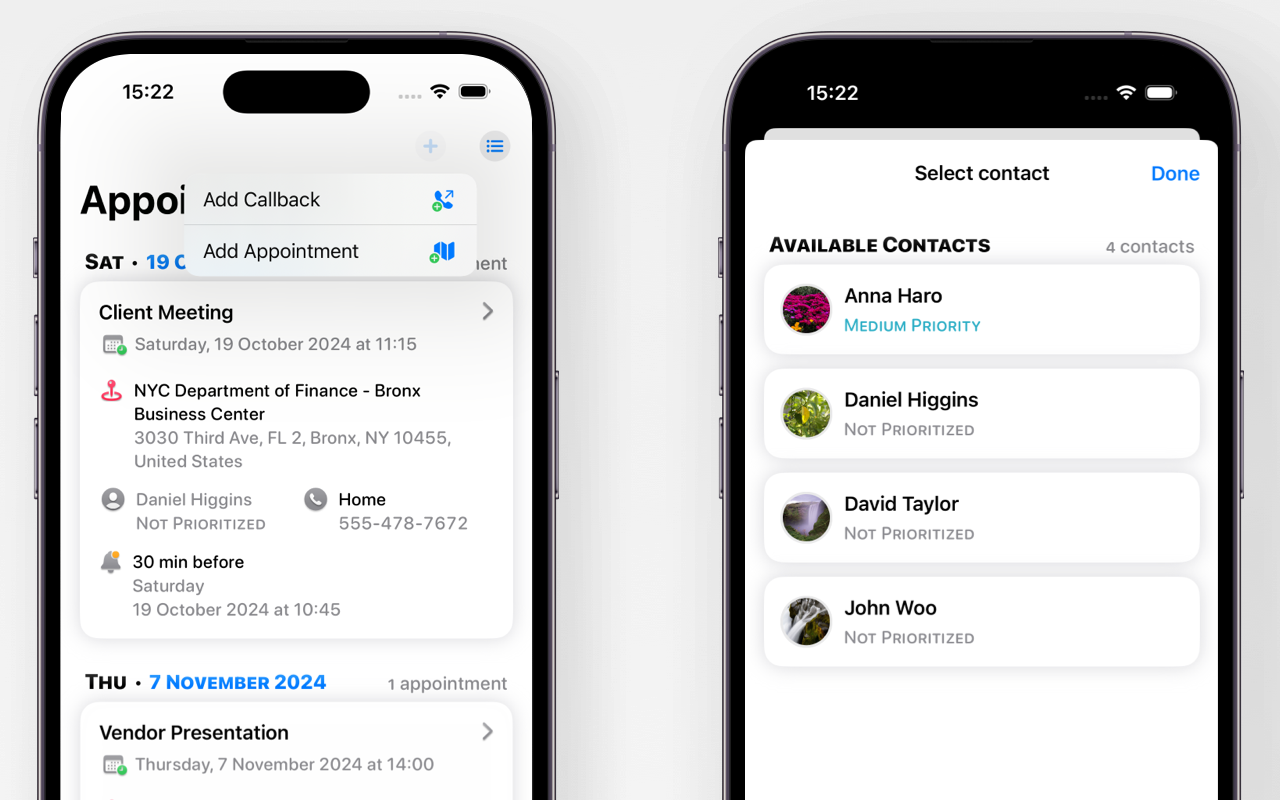
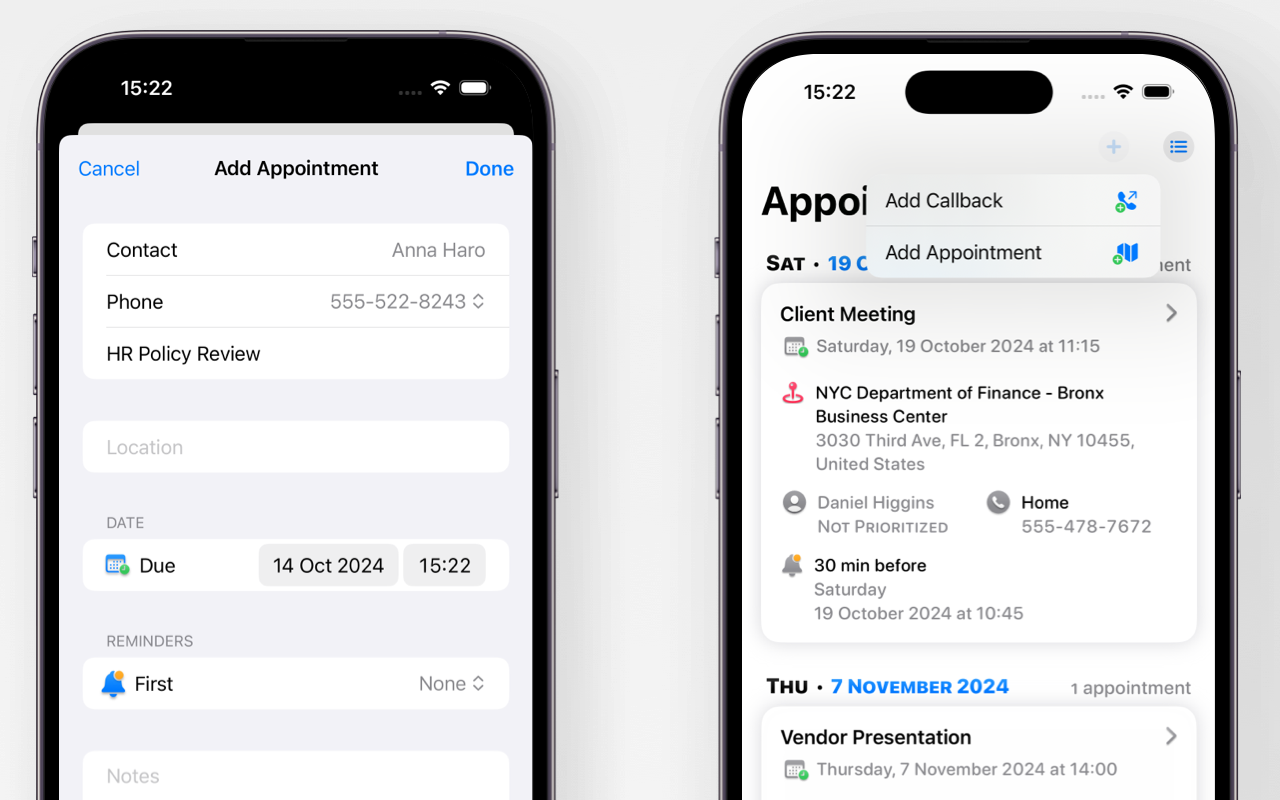
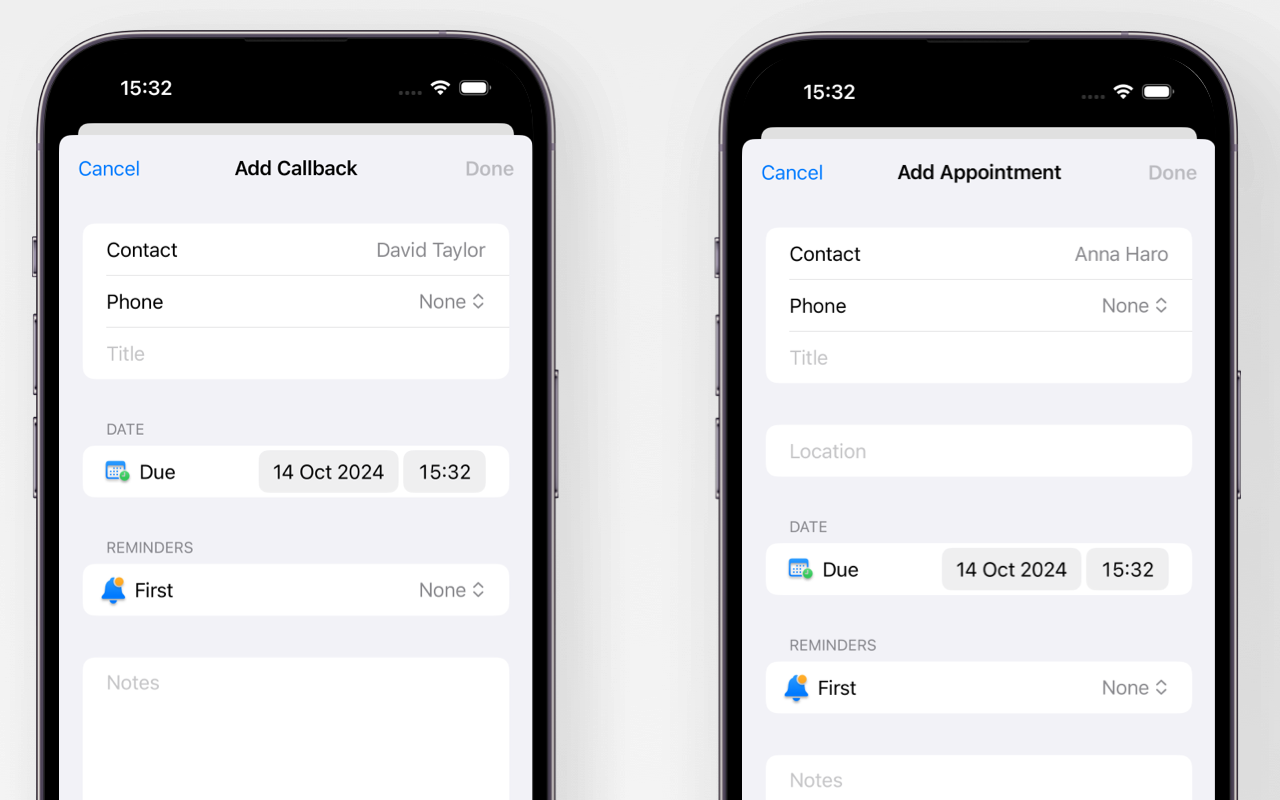
You can set appointment reminders for each contact you want. Click on the reminders tab at the bottom of the screen, then tap the add button at the top of the screen and select "Add Appointment". Select the contact and fill in the reminder details, incl. name, location and time of the event, and reminder's countdown. Then tap "Done" to add the reminder.
Callback Reminders
You can set callback reminders for each contact you want. Click on the reminders tab at the bottom of the screen, then tap the add button at the top of the screen and select "Add Callback". Select the contact and fill in the reminder details, incl. name, location and time of the event, and reminder's countdown. Then tap "Done" to add the reminder.
Swift Contacts Management via App Widget: Navigate Directly from the App
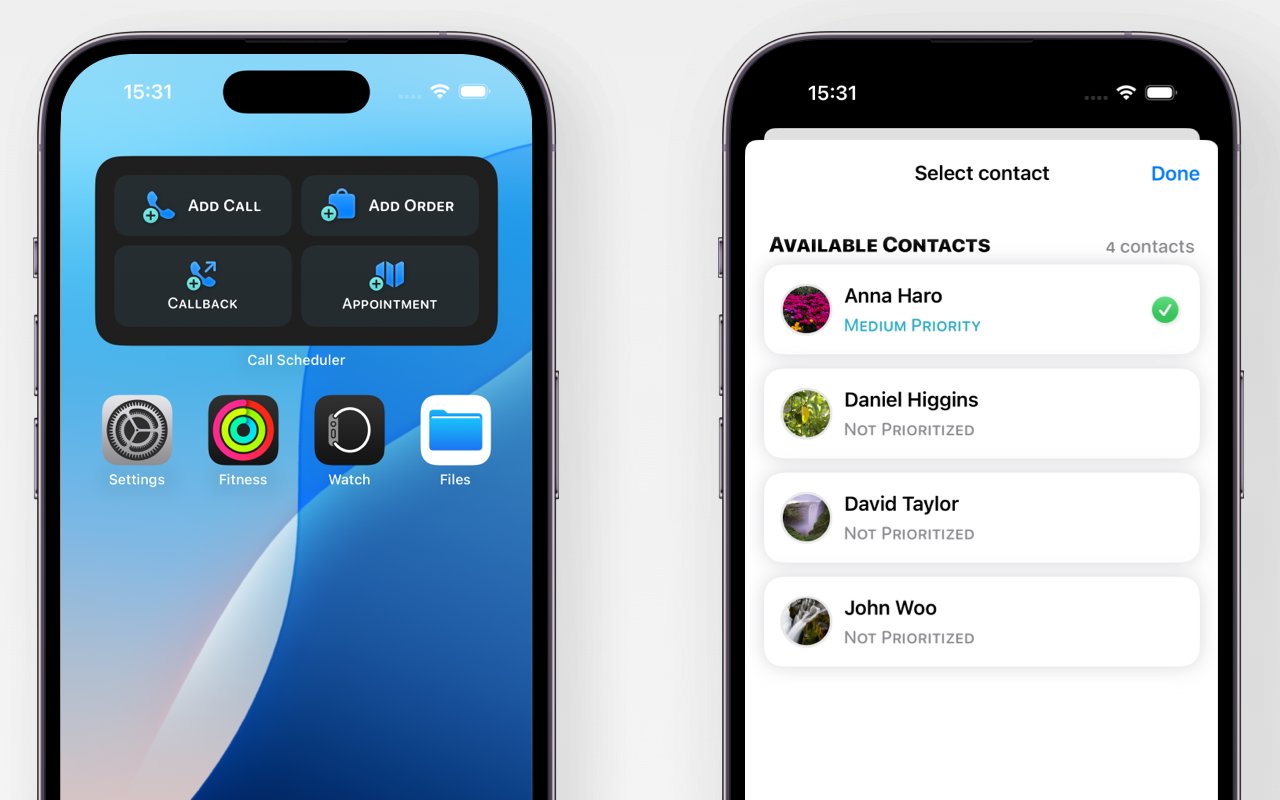
Set Up the Widget
You can quickly access to key contacts, add new calls, orders, and set reminders directly from your home screen. Add the Call Scheduler widget to your iPhone’s home screen following Apple's instructions.
Quick Access to App Features
Tap the widget's "Add Call" button to instantly add call details. Tap the widget's "Add Order" button to quickly add order details. Tap the widget's "Add Callback" or "Add Appointment" button to swiftly add relevant reminder details.
Add & Track Business Appointments: Navigate Directly from the App
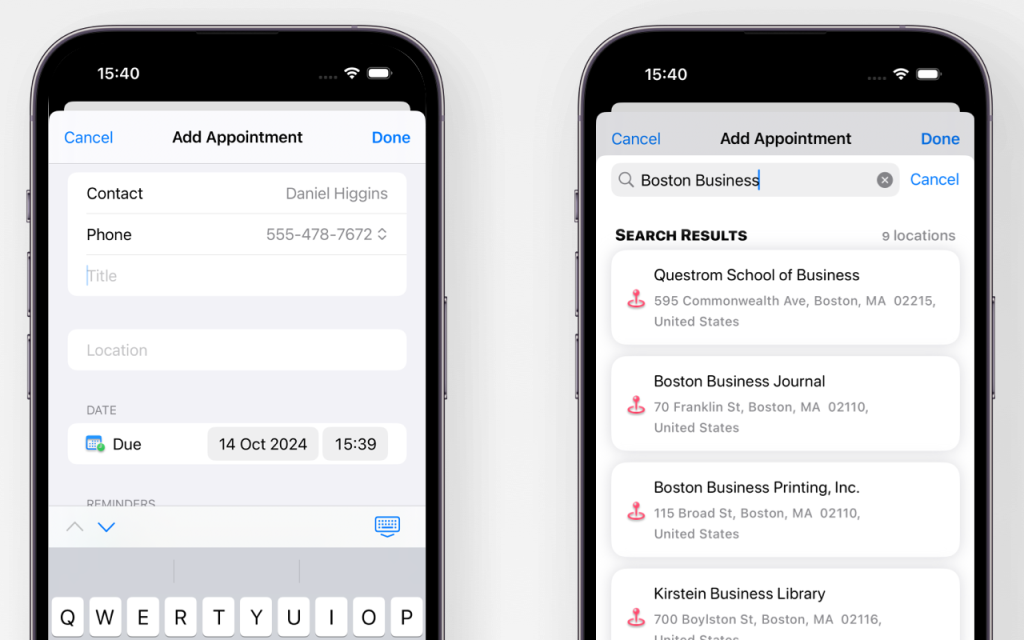
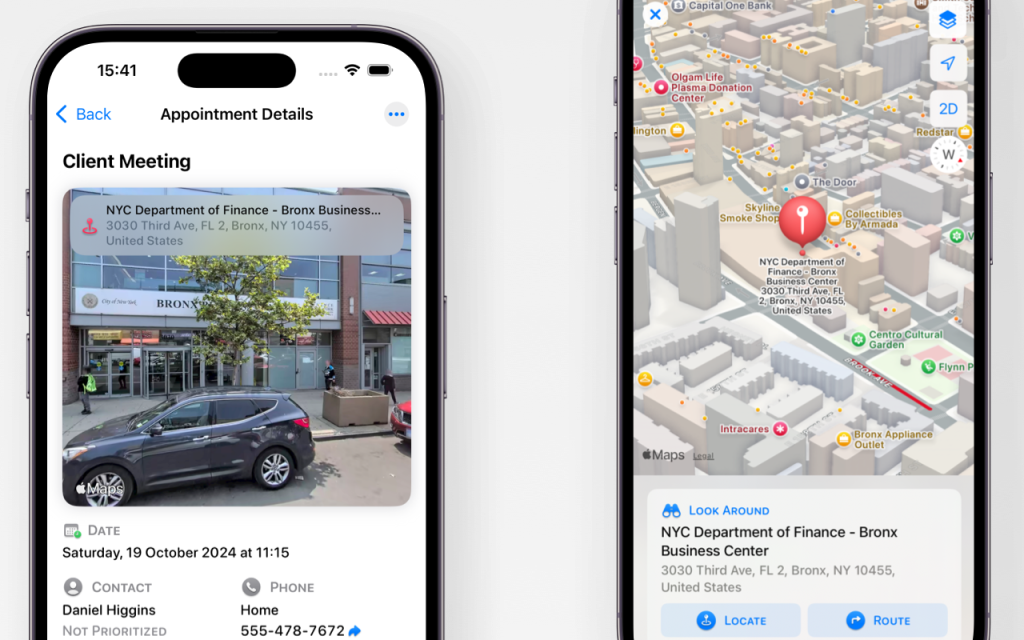
Add Location to Appointment
While creating or editing an appointment's reminder, tap the Location field. Enter the appointment’s address and select location displayed in "Search Results".
Navigate to Location
Open the appointment details and click the location map section. Than click on the "Route" button to get the direction from your current location. You can choose either automobile or walking route directions.
Generate Data: Power Your Marketing Campaigns
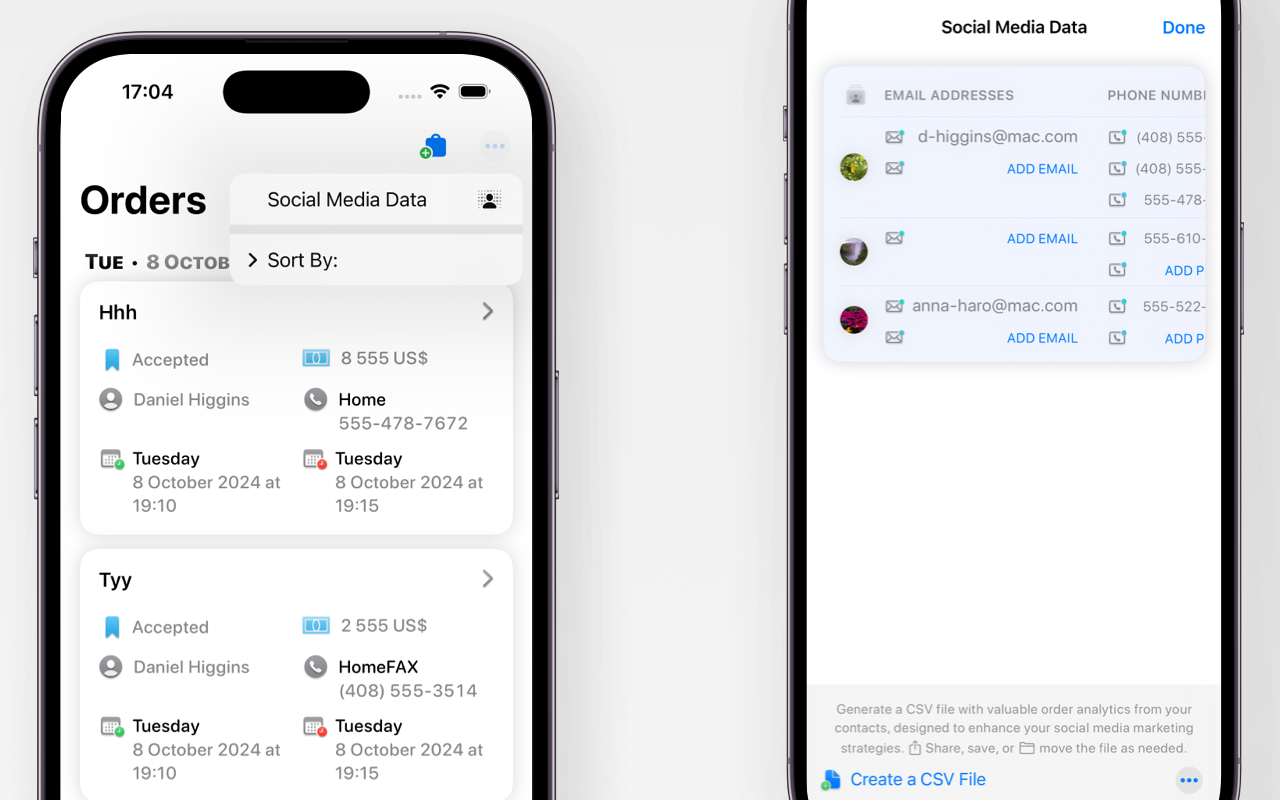
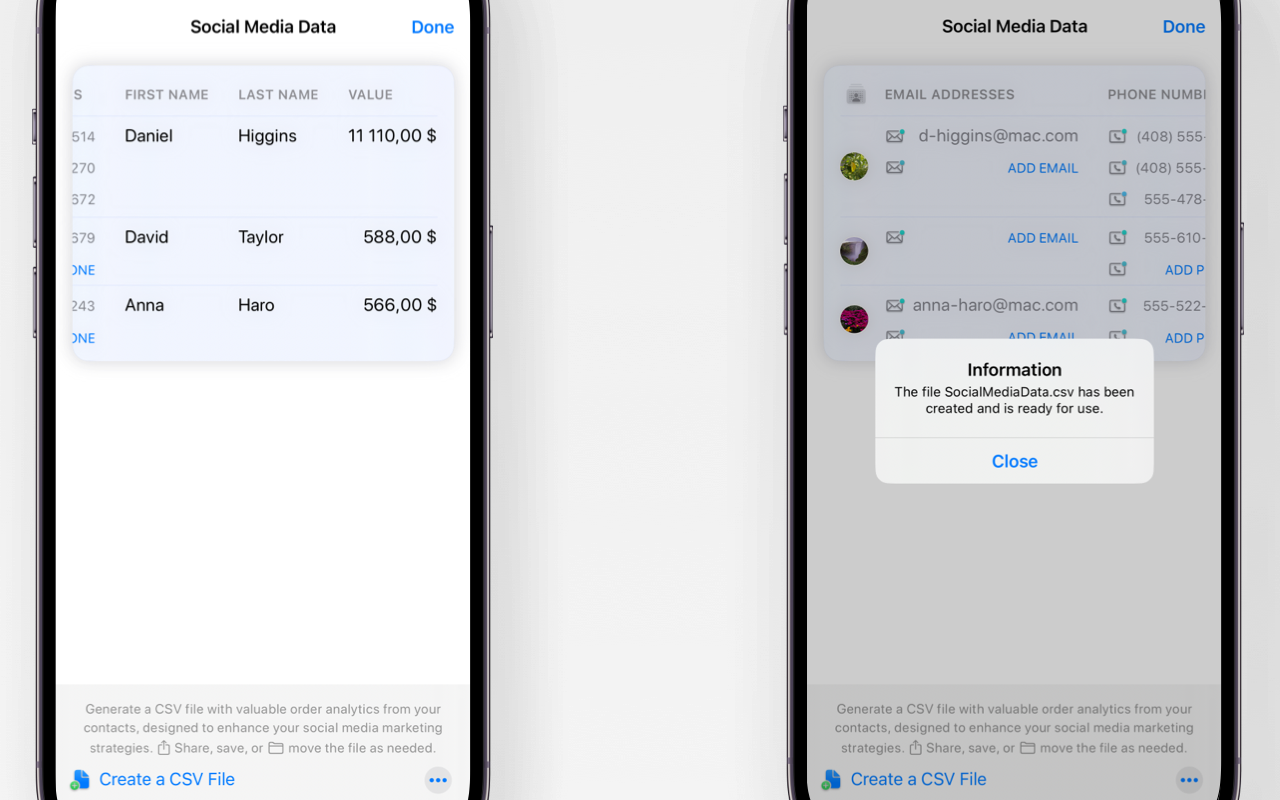
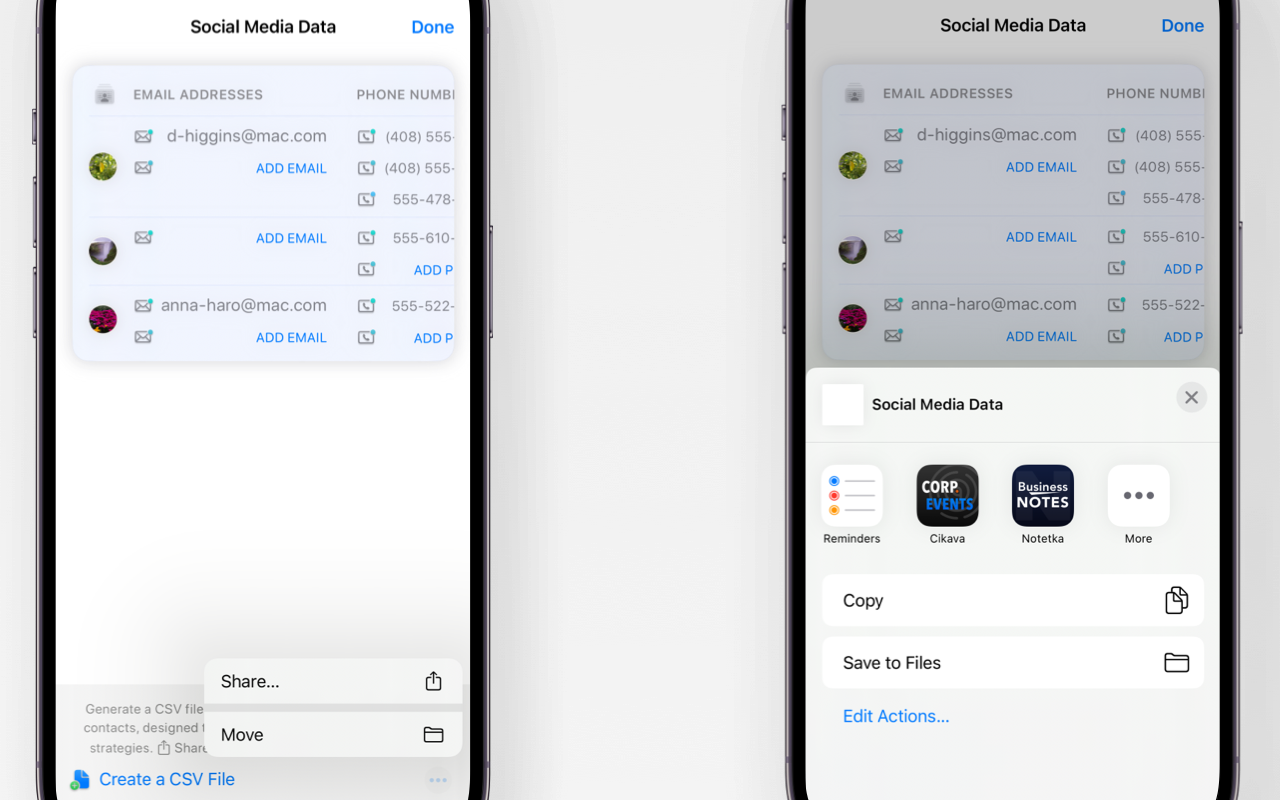
Generate Data File
Click on the order's tab at the bottom of the screen, then - on the "" button. Tap "Social media data" to start generating data. You can add data if needed - up to 3 e-mails and phone numbers. Click "Create a CSV file" to generate the data file.
Share Data File
Click on the on the "" button at the bottom of the screen. You can choose either "Share" option to send data outside your app or "Move" option to store the data in preferred folder on your devices.